
we found out after she developed a diaper rash for the first time ever at 6 months, that she had sensitivities to orange and yellow veggies. Weird right? The doctor thinks she will outgrow this eventually along with her dairy sensitivity, but in the meantime I'm continually searching for recipes for the whole family that don't include dairy or orange and yellow veggies (especially carrots & sweet potatoes which bring the worst of the rash)
This is really hard most of the time because one, I LOVE cheese, and two, green veggies without cheese don't often taste that great. At least not the way I was accustomed to cooking them. So I have to find ways that make them taste good and leave all that yummy dairy aside.
I'll be documenting some of my experiments here and let you know which recipes my toddler will at least eat, even if only a little.
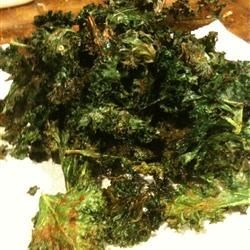
First up Kale Chips!
So Pinterest is a great resource for recipes, but not so specifically for my restrictions. But I found several ideas for Kale Chips and pinned them. I read them all and sort of created my own version.
1. First buy some Kale. Kale looks just like mustard greens to me. I had to dig thru and read the little twist-ties to make sure I had the right veggie..LOL
2. Wash it and pull or cut the green leafy sections from the harder whitish stalks.
3. Throw it in a bowl or zipper bag and toss with your choice of seasonings and EVOO. I like using fresh ground salt, pepper, and some garlic powder...or skip the plain salt and use garlic salt.
TIP: Don't add too much olive oil because your leaves will be too wet and they won't get crunchy enough. You want them super crisp so they are easy for your toddler to eat and you can call them chips! (too much EVOO makes them chewy and harder to eat)
4. I experimented with different cooking times and heats to achieve the best crisp. I found cooking at a lower heat for a longer amount of time helped get them good and crispy without too much browning. I liked 200 degrees for 30-40 minutes stirring when you can. I also cooked at 400 degrees for 20 minutes, but the "chips" were very inconsistent and I had to dig thru and pick out ones crisp enough for my toddler to eat. If they were too tough, she'd chew a while, spit it out, and not want anymore =/
TIPS:
Let your little one help you tear the chips and season them. All of which is pretty easy and not too messy. Getting them involved motivates them to eat what THEY made. It can at least help you get that first bite which is all you need sometimes to get them eating a new food!
Call them "green chips" like we do or some other fun name that resembles something your little one already like to eat. Helps get them excited about the food and again get you that so important first bite.
Don't bug them too much! If they sense you're being weird or pushy about them eating it, they'll likely be very stubborn against the idea. Sometimes I don't even say anything about a new food on the plate. If I don't act like I really want her to eat it, she thinks it's just another item and tries it. =)
You can also find prewashed, precut kale in a bag at some stores. I've had the best luck finding this at specialty stores like Whole Foods and Trader Joes.
Please let me know if you try Kale Chips and if it works for your little ones! Also, please share veggie recipes that your kids love and any tips you've learned with feeding your kids healthy foods!
Upcoming Posts: Green Smoothies & Roasted Cabbage "chips"


